

How To Download Fonts To Windows 10
Are you lot tired of using the same old fonts on your Windows 10 computer? Why get stuck when in that location are several ways you can install fonts on Windows 10? Having new fonts to use can be exciting as they can bring new life to your work.
In this article, learn how to install and manage fonts on Windows 10, and you lot'll never over again have to settle using the default system fonts. Let get started!
Prerequisites
If y'all'd like to follow the steps in this tutorial, make sure that you meet these requirements.
- A Windows ten PC. This tutorial will be using Windows ten version 20H2.
- If you want to install fonts for all users on the calculator, your user business relationship must have administrative rights on the Windows x PC.
Installing Fonts in Windows ten
When you demand to install fonts in Windows x, there are several ways y'all tin can do so. Each method is dissimilar, only the issue is the aforementioned. You'll have new fonts that you can apply with various applications, such as word processors and text editors, to proper name a few.
Permit's explore the different ways you tin can install fonts in Windows 10.
Annotation: That the succeeding font installation methods install new fonts in the %LOCALAPPDATA%\Microsoft\Windows\Fonts directory of the current user only by default. If you want to install fonts for all users on the computer, skip to the Using the Font Viewer (All Users) department.
From the Microsoft Shop
Microsoft gives its Windows 10 users the power to install apps directly from the Microsoft Store. But did you know that aside from apps, the Microsoft Shop besides lets you install fonts on Windows 10?
All-time of all, you'll be browsing available fonts like an online shopping catalog. And installing them is convenient with but a few clicks. To install fonts on Windows 10 using the Microsoft Store, follow the steps beneath.
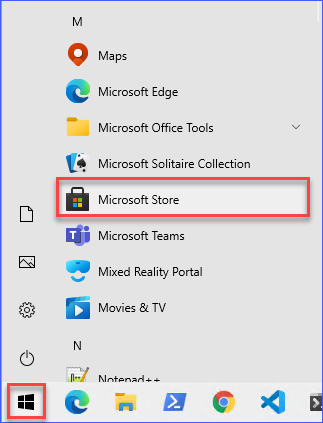
- Before you tin can install fonts, you beginning need to open the Microsoft Store. To exercise and then, click Offset → Microsoft Shop.
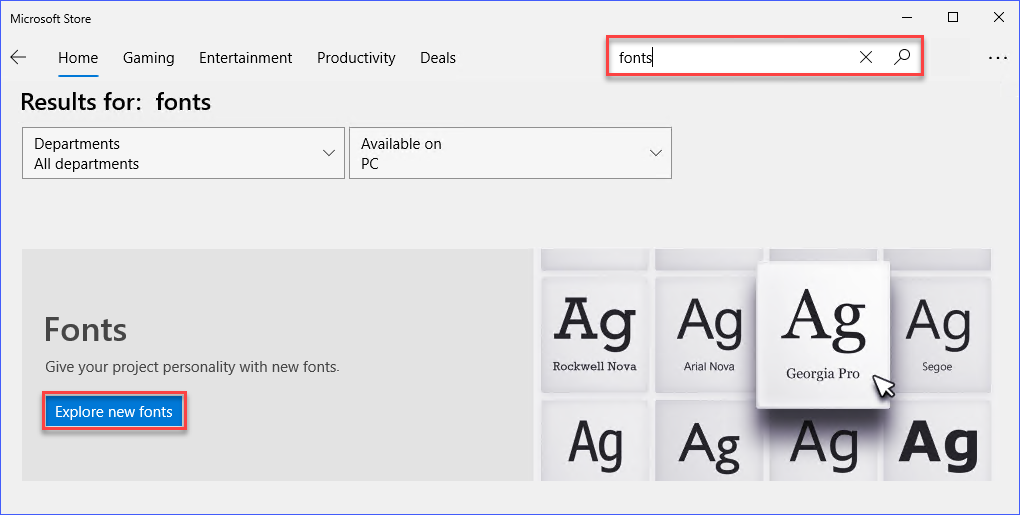
2. Once the Microsoft Shop window is up, type fonts in the Search box and press Enter to search.
After the search, on the results, click the Explore new fonts button. Clicking the Explore new fonts push button will bring y'all to the fonts gallery.
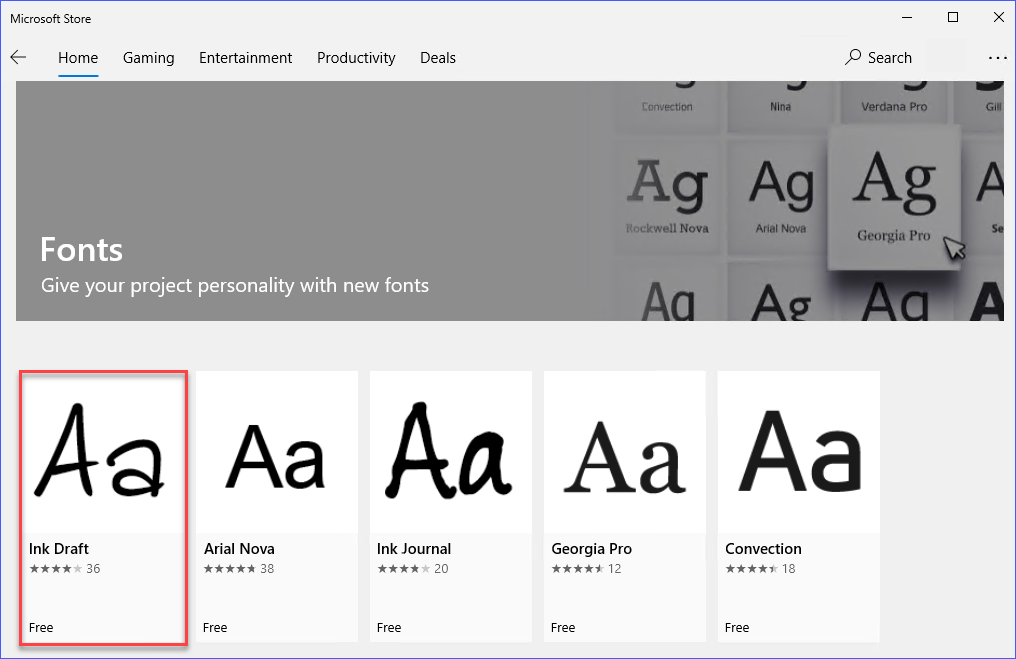
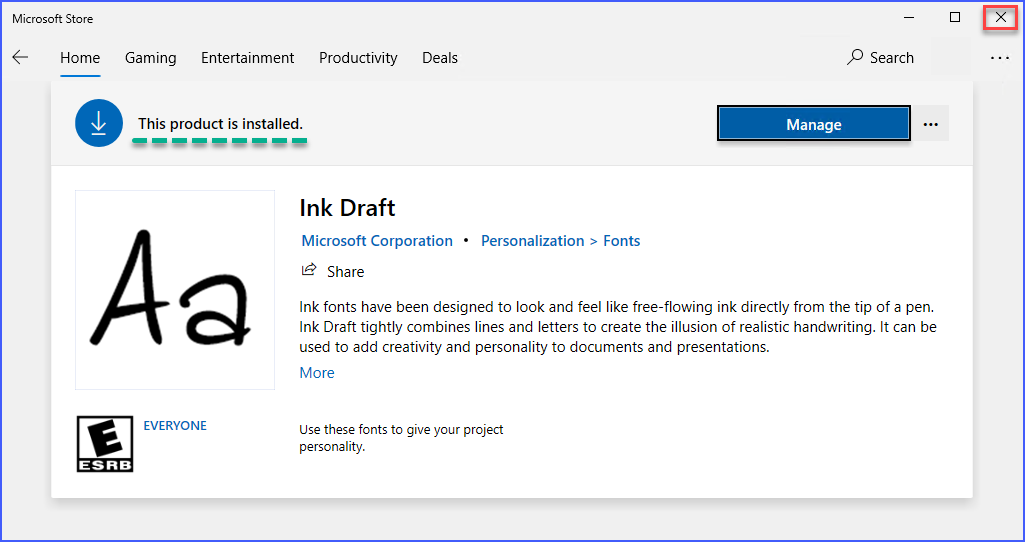
3. Adjacent, yous'll run into the list of bachelor fonts that you lot tin install on your Windows x computer. Look for the font you want to install and click it. This example will select the Ink Draft font, which is free.
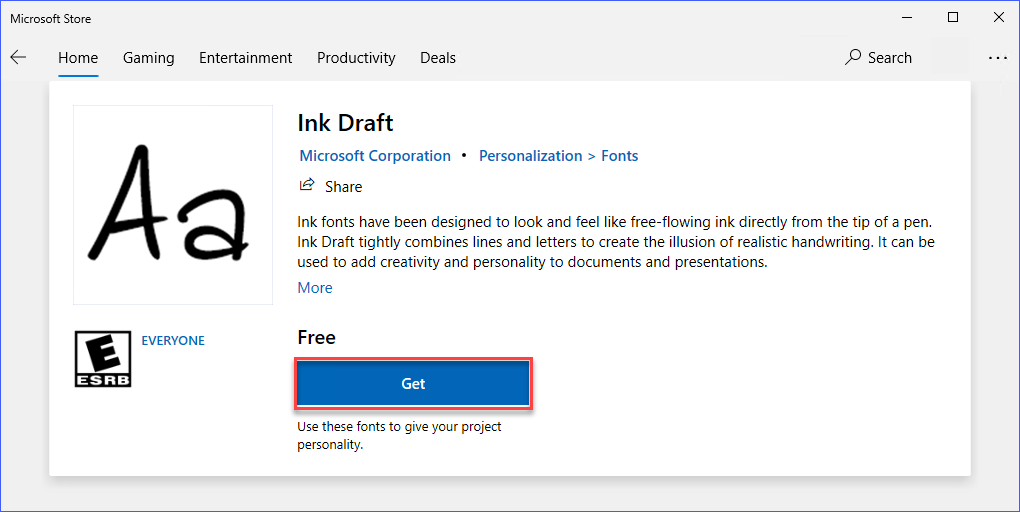
iv. Afterwards selecting the font, y'all'll arrive at the font's defended data page. On this page, you'll find the details nigh the font. To continue installing the font, click the Get button.
The installation process may have several seconds to complete. In this example, the installation took merely xxx seconds.
v. Afterwards Microsoft Store completed the installation, y'all will encounter a bulletin saying This product is installed. To exit Microsoft Store, click the X button in the upper-right corner. Or, if yous want to install more fonts, you can repeat the aforementioned steps.
Using the Windows Settings App
The internet offers seemingly unlimited resource that you tin can download, including fonts. If y'all've constitute a font that you like and downloaded information technology onto your computer, what next?
Another way to install fonts on Windows 10 is by dragging and dropping a font file into the Font setting app. How convenient is that? Follow the steps below to install a font in Windows 10.
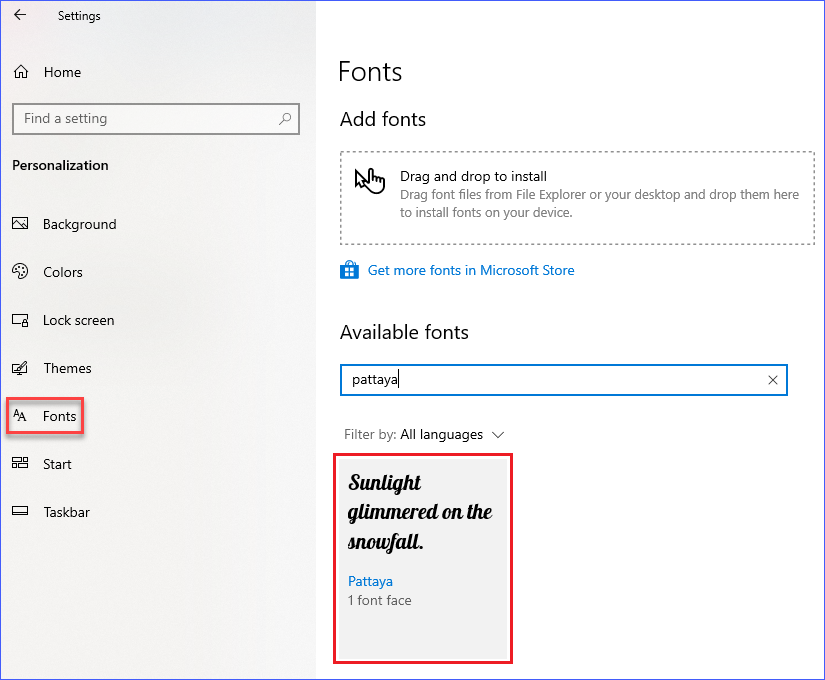
If yous don't have a sample font for testing, y'all may download the Pattaya font showtime, which this example will utilize.
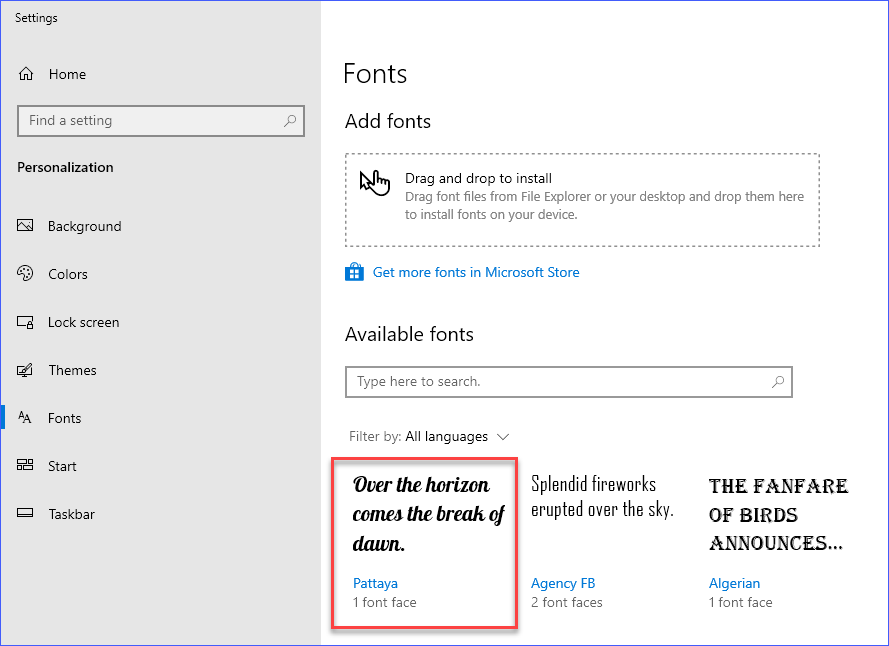
ane. Commencement, open the Fonts settings on your computer. To do so, correct-click on any blank space on your Desktop and click Personalize.
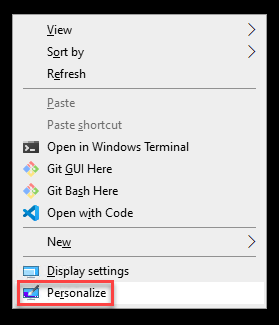
2. On the Settings window, click the Fonts tab under the Personalization section.
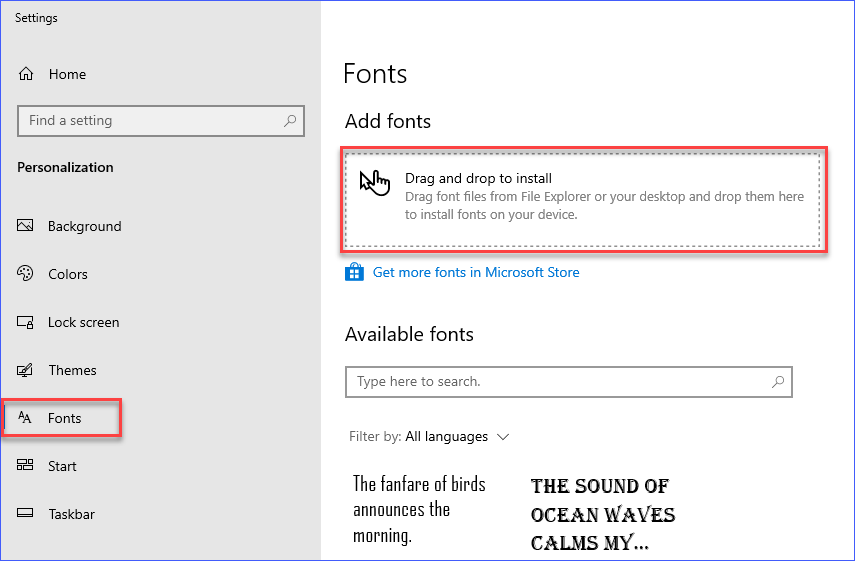
Nether the Add fonts section, you lot should see a rectangular expanse that says Elevate and driblet to install. This area is you can drop one or more than font files from your computer to install.
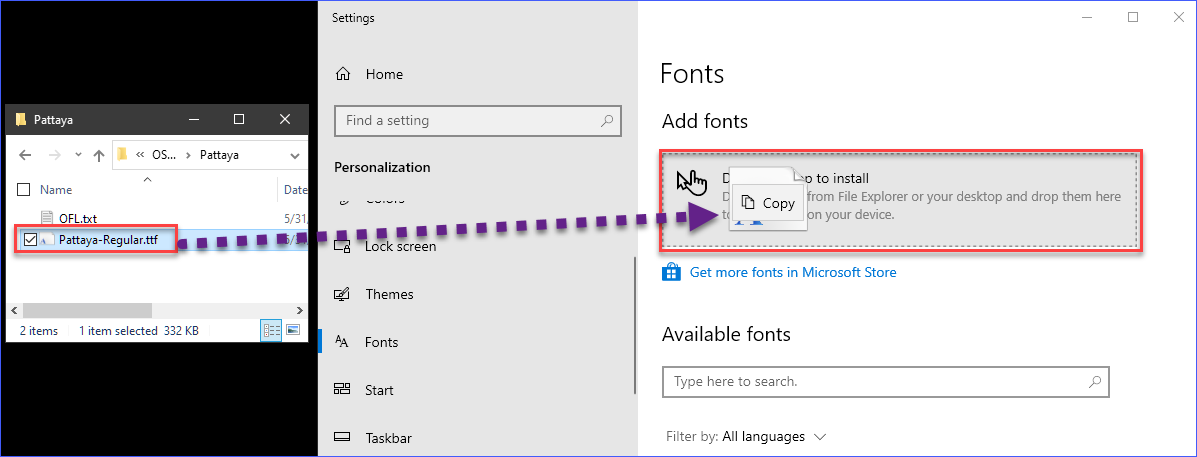
three. At present, open the File Explorer and navigate to the directory where you take downloaded the font. One time you lot've located the font file, click to concur the file, drag it to the Fonts settings window, and drop information technology to the Drag and drop to install area. Doing and so will install the font on the Windows 10 computer.
Yous can too elevate and drop multiple font files at the same time.
After installing the font, you can find the new font immediately under the Bachelor fonts listing.
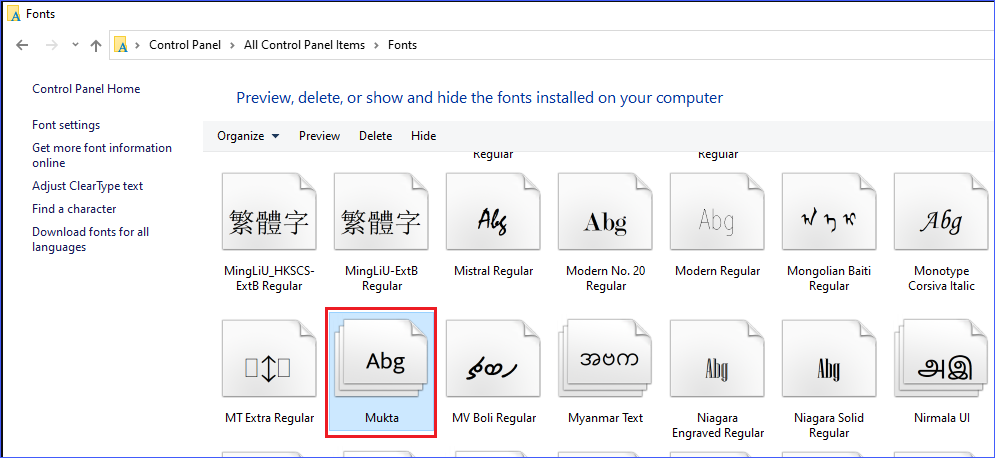
Using the Control Console
The more than traditional method to install fonts in Windows ten is through the Control Panel. Like the Windows Settings app, you'll need to drag and drop 1 or more files from a location on the figurer to the Command Console to install fonts.
Follow the steps below to install fonts in Windows ten using the Control Panel.
1. Open File Explorer and locate the directory where y'all have downloaded the font files. Keep the File Explorer window open up.
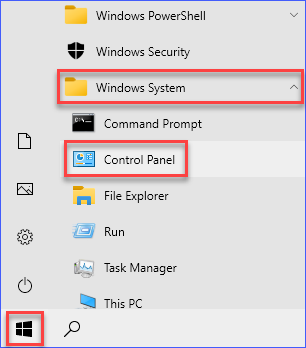
ii. Next, open the Command Console window. To do so, click the Start → Windows System → Control Panel.
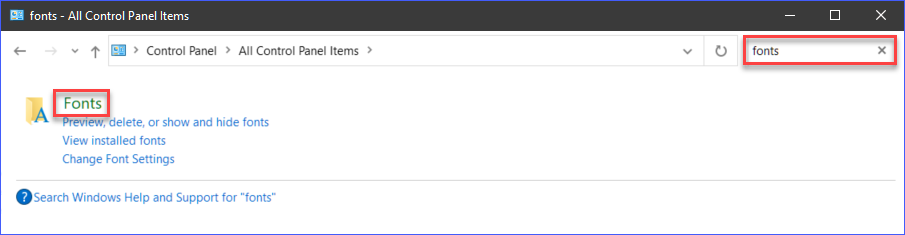
three. On the Control Panel window, click the search box on the top right and type in fonts to search for the Fonts Command Console item. On the search results, click the Fonts Control Console item to open the Fonts window.
4. Now you have both File Explorer and the Fonts Control Console opened. On the File Explorer window, click or select the font files yous want to install.
After selecting the font files, click to hold the files, drag them to the Fonts Command Console window, and release the mouse button to driblet the files. Dropping the files will automatically install the fonts on your computer.
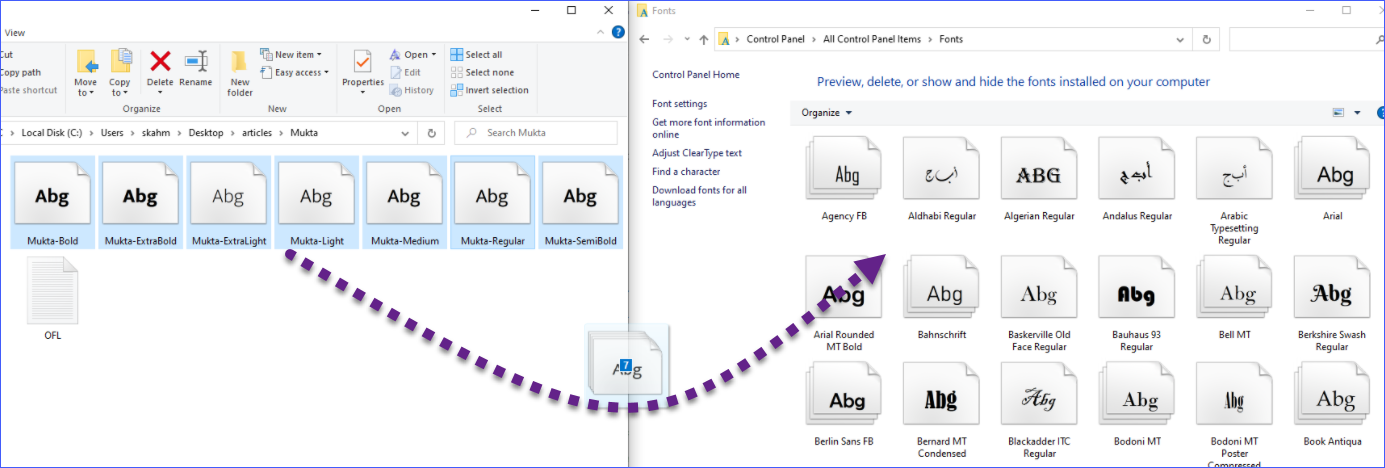
Later installing the fonts, y'all can now see them in the Fonts Control Panel window.
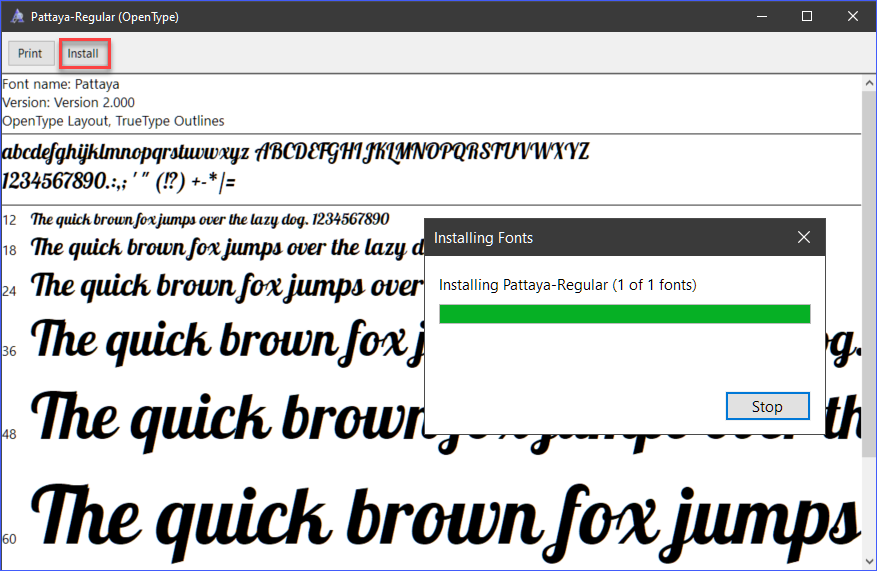
Using the Windows Font Viewer
In Windows, font files open with Windows Font Viewer by default. The Windows Font Viewer is a congenital-in Windows program for viewing and installing fonts (%WINDIR%\System32\fontview.exe).
To view and install fonts in Windows 10 using the Windows Font Viewer, follow the steps below.
- Open the File Explorer and browse to the font file'southward location.
- Once you've located the font file, double click the font file to open up information technology in the Windows Font Viewer window.
- On the Windows Font Viewer, you'll come across the font details and its preview. To install the font, click the Install button at the top of the window. The font installation should complete quickly, and there will be no confirmation letters.
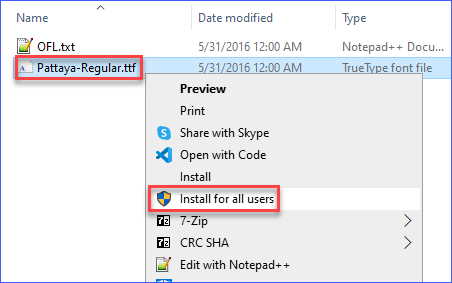
Using the Windows Font Viewer (All Users)
Up to this point, yous've just been installing new fonts in the user context, which puts new fonts in the %LOCALAPPDATA%\Microsoft\Windows\Fonts binder past default. Meaning, in shared computers, each user must install the font in their user profiles.
Using the Windows Font Viewer, y'all can install fonts for all users on a computer. But your user account must take administrator rights on the figurer.
Installing fonts for all users volition install the font file to the %WINDIR%\Fonts folder.
To install fonts for all users, open the File Explorer and browse the font file's location. Next, right-click on the font file and click Install for all users.
During the font installation, you'll only briefly encounter the progress indicator similar to the paradigm below.

Uninstalling Fonts in Windows ten
In that location may be times when you need to uninstall fonts from your computer. Such equally when yous no longer need the font or if you plan to install an updated version of the font. Whatever the reason, know the there are ways to uninstall fonts in Windows 10 you tin perform.
Note: When uninstalling a organization-wide font (all users), your user business relationship must take administrator rights on the local computer.
Using the Windows Settings App
One way to uninstall fonts in Windows 10 is from the Windows Settings App. To do and then, go on as follows.
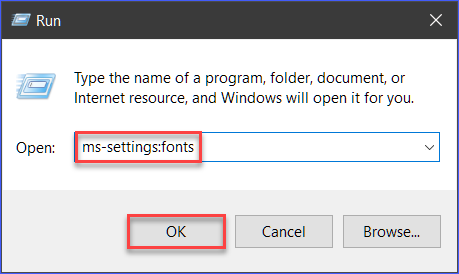
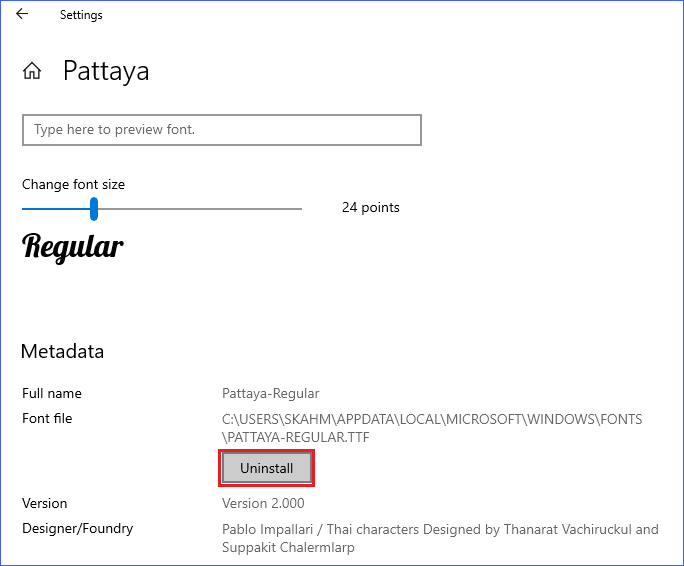
1. First, open up the Fonts Windows Settings. To practice so, right-click the Start button and click on Run to open the run dialog box. On the Run dialog, type the command ms-settings:fonts in the Open box and press Enter or click OK.
two. Side by side, nether the Available fonts listing, blazon the font'south name you want to uninstall in the search box. On the search results, click the font name to open its properties.
3. In one case you're in the font'south properties window, click on the Uninstall button. Clicking on this button volition uninstall the font from the computer.
Using the Command Console
Another method to uninstall a font in Windows 10 is through the Control Console.
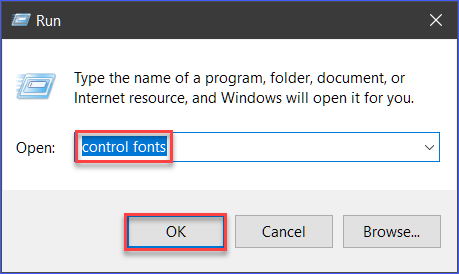
1. To open Fonts Control Console, right-click the Start push and click Run. In the Open up box, type in control fonts and press Enter or click OK.
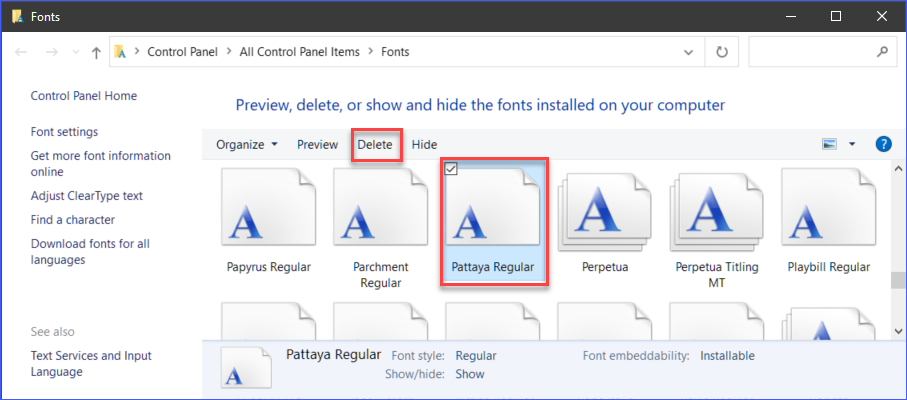
2. You should now exist in the Fonts listing in Control Console. To uninstall a font, click to select the font and click the Delete button. You tin also select multiple fonts by holding down the CTRL key while clicking on each font.
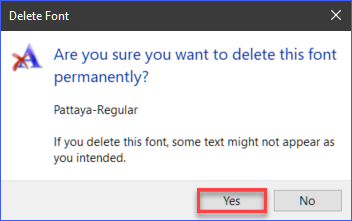
3. At the confirmation window that pops up, click Yeah to confirm to delete the font.
Determination
This article showed you how not to get stuck with the same set of organisation fonts, which tin be boring over time. You learned the different means to install fonts in Windows 10 and how to uninstall them, too. Which method did you like all-time?
Do you know other ways of installing fonts in Windows ten that weren't in this tutorial? Let us know!

Source: https://adamtheautomator.com/install-fonts-windows-10/
Posted by: foglefulaw1952.blogspot.com
0 Response to "How To Download Fonts To Windows 10"
Post a Comment